|
Installing A CD/DVD-ROM/WRITER
-Hooking up the CD/DVD-ROM or even a CD/DVD-Writer is a breeze. It will take more patience than anything. Sometimes getting the IDE cable in and out of other wires can be a chore. This section will cover installation of a DVD-ROM and DVD-Writer. These installations are the same really. The only thing to keep in mind when installing one is whether to make it a slave drive or a master. If you are installing just the DVD-ROM you should slave it off the hard drive. This is done by setting the CD-ROM to the slave setting with a jumper. The combination doesn't really matter as far as which IDE slot on the motherboard you use. As long as the hard drive is a master to the primary IDE slot you are on the right track. Remember that only one slave and master to a IDE slot on the motherboard. If you are installing a SCSI drive you can have more. Refer to your systems manual for more information.
-Now lets start on the installation of two optical drives, a DVD-ROM and a DVD-Writer.
-Make sure the computer is off
-Ground yourself, touch power supply often to discharge any electrostatic electricity from yourself.
-Unscrew back off case for case cover removal
 |
Unscrew Case |
-Remove Cover
 |
Remove Cover |
-Find two open 5.25 bay on the computer and push plate out from back. Sometime you may have to remove a plastic plate and a metal backing. This can be aggravating. Simply pry it off with a screw driver. Another way is to simply move the metal back and forth till solder breaks loose. (refer to your case manual as each case differs)
-Before sliding the drives in the case make sure the top drive is set to slave and bottom drive is set to master. Slide DVD-ROM and DVD-Writer in from the front.
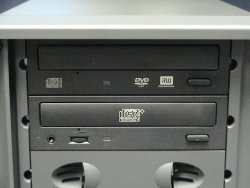 |
Drives installed. |
-Line the DVD-ROM and Writer up with mount holes of the bay.
-Screw them in snug, make sure it looks good on the outside before you get to carried away with tightening it down. Make sure they are flush with the rest of the drives. This is purely cosmetics.
-Take a ribbon cable and plug it into the motherboard. Plug the next connector into the master drive (bottom one) and the last connector into the slave drive (top one). The connectors can only go in one way as there is a notch on the cable that lines up with the holes on the sockets.
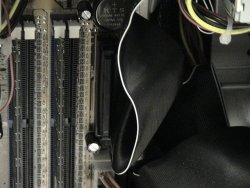 |
Hooking IDE cable to the motherboard. |
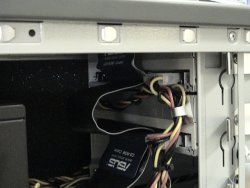 |
Cables connected to both optical drives with power cables inserted. |
-Hook up the power cables to the drives.
-Boot computer.
 The DVD Format Wars The DVD Format Wars
Back To Hardware Guides
Popular Articles:
How To Build A PC | Different Types of Keyboards | Help with Hard Drive Installation | Computer Networking Basics | Introduction of Motherboard Functions | Computer CPU Processor Speed | Upgrade from Windows 95 to Windows 98 | Computer Monitor Troubleshoot | Partition Hard Drive | Installing New CPU Processor | Types of Network Cables |


